Restorative areola tattooing is each emotional and technically difficult, typically marking the ultimate step in a profound journey.
Whereas honing your technical expertise is essential, enhancing your consumer’s expertise is equally very important. It fosters belief and luxury, and aids of their therapeutic course of.
Our weblog explores this important aspect of areola tattooing, providing insights and methods for higher consumer connections.
Areola tattoo in progress courtesy of PRO Staff artist Jill Hoyer utilizing I  INK Needle Cartridge
CLICK HERE to buy our full vary of needle cartridges
Perceive your consumer’s motivations by connecting with their journey.
Understanding your consumer’s motivations is essential, as they might come from various backgrounds and search tattooing for varied causes:
Individuals who have undergone mastectomy or breast reconstruction surgical procedure might search areola tattooing to regain a pure look. For individuals who have undergone nipple reconstruction surgical procedure, areola tattooing can add lifelike shade and dimension to the newly created nipples.
- People with congenital variations:
These born with congenital variations, such because the absence or irregularity of the areola, might look to reconstructive tattooing for assist with reaching a extra typical look.
People who’ve had breast discount, augmentation, gender affirmation procedures, or different breast surgical procedures might go for areola tattooing to boost aesthetic outcomes or obtain improved symmetry.
- Scarring or damage survivors:
Individuals who have skilled breast accidents or accidents leading to scarring might search areola tattooing to disguise scarring.
- Put up-aesthetic enhancement:
Some shoppers might select areola tattooing purely for beauty causes, aiming to boost the general look of their breasts with improved shade or form.
Recognizing this range empowers you to supply personalised care that goes past technical experience.
Familiarize your self with medical phrases to interact in knowledgeable conversations about your consumer’s journey and expectations.

Throughout your session, it is important to debate your consumer’s surgical historical past, together with any issues, and set up their targets. Purchasers looking for restorative areola tattooing might have undergone varied breast reconstruction procedures, resembling:
- DIEP flap (Deep Inferior Epigastric Perforator Flap):
Utilizing the physique’s personal tissue, usually from the decrease stomach space with out sacrificing the stomach muscle tissues.
- GAP flap (Gluteal Artery Perforator):
Taking tissue from the buttock space, together with pores and skin, fats, and typically muscle.
Utilizing silicone or saline implants to recreate the breast or chest form. Implants are sometimes used along with different reconstructive procedures.
Utilizing muscle, pores and skin, and fats from the higher again, typically together with implants.
- SIEA flap (Superficial Inferior Epigastric Artery Flap):
A specialised type of DIEP flap reconstruction, using the superficial blood vessels of the decrease stomach tissue with a microsurgical method that minimizes disruption to the stomach muscle tissues.
- TRAM flap (Transverse Rectus Abdominis Myocutaneous Flap):
Using a portion of the rectus abdominis muscle together with pores and skin and fats from the decrease stomach space.
- TUG (Transverse Higher Gracilis):
Transferring tissue from the inside thigh space, particularly the gracilis muscle and surrounding tissue.
It is necessary to notice that shoppers looking for restorative areola tattooing might not have essentially undergone most cancers remedy. Different surgical procedures they might have skilled embody:
- Breast discount surgical procedure:
Breast discount surgical procedure, or discount mammoplasty, minimizes the general quantity of the breasts, typically to alleviate the discomfort and well being points related to a big chest. This process entails eradicating extra breast tissue and pores and skin, which can alter the form, measurement, or shade of the prevailing areolas.
Mastopexy, often known as a breast elevate, is a surgical process designed to elevate and reshape sagging breasts. Typically, this process might contain repositioning or resizing the areolas.
Pores and skin grafts could also be used to deal with quite a lot of medical situations, resembling extreme burns or traumatic accidents. If a pores and skin graft is utilized to the breast space, it might lead to adjustments to the looks of the areolas in measurement, shade, texture, or placement.
People present process prime surgical procedure as a part of their gender affirmation course of might go for chest masculinization or chest feminization surgical procedure. Relying on the specified final result, surgical areola resizing might outcome within the want for future repigmentation.
Every process has its issues and advantages, tailor-made to the consumer’s anatomy, historical past, and targets. Familiarizing your self with these surgical procedures and reconstruction strategies will improve your means to supply personalised and empathetic providers.

Domesticate a secure area by providing empathy and constructing belief together with your consumer.
Making a secure and supportive setting is paramount for an enhanced consumer expertise. This fosters a robust emotional connection and builds belief and rapport between you, the artist, and the consumer. Empathy, the power to grasp how somebody feels, is important on this course of. Listed here are methods to show empathy:
- Align on targets and expectations:
Tailor the process to the consumer’s targets for model, areola measurement, shade, and placement, and contain the consumer in all decision-making. Be sure that each you and the consumer have a transparent and shared understanding of the specified final result.
- Think about your sensitivity to trauma:
Bear in mind that some shoppers might have skilled trauma associated to their preliminary damage, surgical procedure, or most cancers. Method the process with further sensitivity, and ask if there are any triggers or issues try to be conscious of.
Supply emotional help by being a compassionate presence. Reassure the consumer that you simply perceive their journey and that you’re there to assist them of their therapeutic course of.
Respect the consumer’s privateness and modesty by providing a non-public area for altering or disrobing together with draping choices to make sure their consolation and dignity. Be sure to get clear approval earlier than sharing pictures, and at all times provide to crop the consumer’s face or recognizable options out.
- Keep physique positivity:
Promote a body-positive setting by avoiding judgmental or important feedback in regards to the consumer’s physique. Encourage self-acceptance and self-love, whereas remaining open to any requests they’ve about their desired outcome.
- Make a private connection:
Construct belief and connection on a private stage by discovering one thing optimistic to speak about that you simply share in frequent. You may inquire about their music preferences or ask about household and pets and report this info for future reference in your process notes
- Follow lively listening expertise and open communication:
Use empathetic and reassuring language to convey understanding and help to the consumer, assuring them that their emotions and issues are legitimate. Keep clear and open communication, addressing their issues, questions, and preferences, and clarify every step of the method.
- Learn and establish physique language:
Non-verbal cues resembling facial expressions, posture, and gestures can present worthwhile insights into your consumer’s consolation stage and emotional state. Use this info to regulate your method and supply extra help or reassurance as wanted.
- Uphold efficient ache administration:
Be attentive to the consumer’s consolation in the course of the process, maintaining in thoughts that sure areas could also be numb, whereas different spots could also be further delicate. Supply breaks if wanted and supply choices for ache administration, resembling numbing lotions like Zensa as a main (on unbroken pores and skin), and Tag 45 or Extremely Period in your secondary (as soon as the pores and skin is damaged).


Relating with empathy creates a secure area for all feelings, recognizing the vulnerability of the consumer’s journey. Your position is to make sure they really feel protected, supported, and empowered all through the method.
Construct lasting relationships and foster a way of group post-procedure.

Following up together with your consumer post-procedure to remain in contact, particularly after such an intimate remedy, is essential for guaranteeing their ongoing consolation and satisfaction. It demonstrates your dedication to their journey and builds lasting relationships based mostly in your newly constructed belief and empathy.

Areola tattoo in progress by Terry Vigorous, courtesy of The Collective course: 3D Areola Tattooing
In closing, as artists within the realm of restorative areola tattooing, we play a profound position in our shoppers’ therapeutic and self-discovery. We now have the ability to remodel lives via our expertise and compassion. By providing empathetic, personalized, and supportive providers, you’ll be able to assist shoppers regain their confidence, dignity, and sense of self after their difficult journeys. By our experience and compassion, we not solely improve appearances but additionally restore confidence, dignity, and hope.
Collectively, as a group, we make a long-lasting impression on those that’ve confronted adversity. We’re not simply tattoo artists; we’re healers and advocates for empowerment. Let’s proceed nurturing our shoppers’ sense of self and resilience, leaving them not solely with a fantastically crafted areola tattoo but additionally renewed self-assuredness.
Thanks for being a part of this outstanding journey. Collectively, we make a distinction, one tattoo at a time.
Discover our on-line course, “3D Areola Tattooing on The Collective,” for in-depth technical information and steering by PMU veteran Terry Vigorous. This course is appropriate for skilled artists, with a minimal of three years within the discipline and machine expertise. Areola tattooing expertise will not be required.

CLICK HERE to enroll into 3D Areola Tattooing by Terry Vigorous


 Stretching strategies by Ramona Krusinskiene, courtesy of


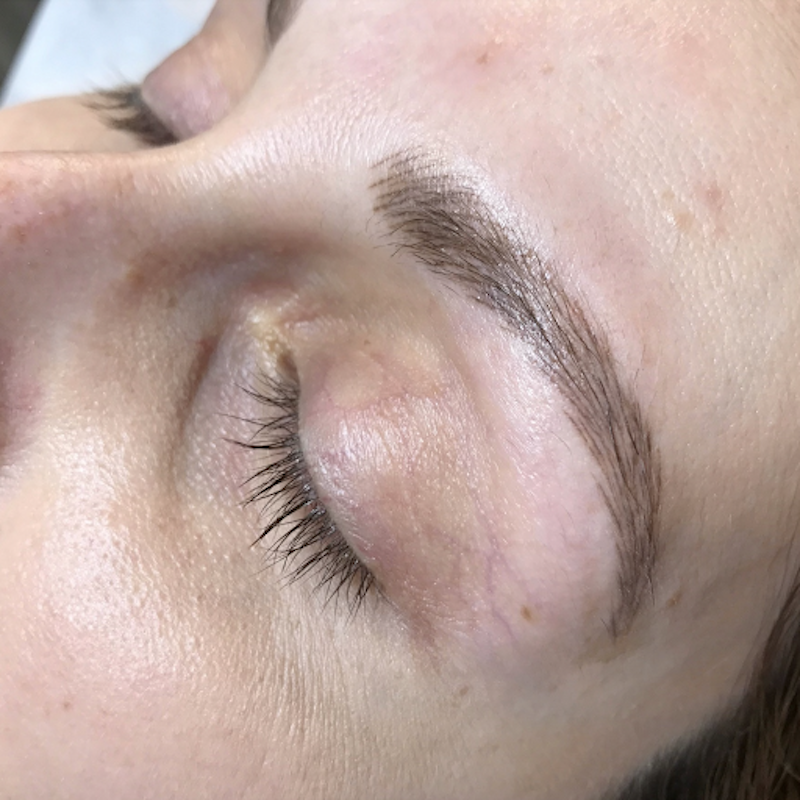

 Healed microblading utilizing FADE pigment in

 Healed microblading utilizing Sundown pigment in


